
Introduction
Setting up a simple RESTful development environment to play with can be surprisingly difficult. Furthermore, if you’re using Java you may have to use different IDE plugins (e.g. for Eclipse or NetBeans), and to rely on the IDE’s integration with a web server.
In this tutorial, I will show how to set up a RESTful server (Jetty+Jersey) to start from a standard Java main method. Furthermore, using Maven we’ll package the entire application in a single executable jar file, which can be started from any machine with a Java environment. Finally, we’ll see how to import it into Eclipse, so we can develop and debug there.
Prerequisites
Before following this tutorial you should have JDK 7 and Maven 3.2 or later installed on your system. Installation instructions can be found here:
- http://docs.oracle.com/javase/7/docs/webnotes/install/
- http://maven.apache.org/download.cgi#Installation
If you plan to work with Eclipse, you will need Eclipse IDE Java EE Developers.
Maven Project
First, we need to create a simple maven project called
restprj. We do so by using the simplest quickstart maven archetype.
It creates a simple App java class and an AppTest unit test for us.
We’ll delete the test, as we won’t need it for now:
1
2
3
4
5
mvn archetype:create -DgroupId=com.rest.test
         -DartifactId=restprj
         -DarchetypeArtifactId=maven-archetype-quickstart
cd restprj
rm src/test/java/com/rest/test/AppTest.java
Now we need to edit the pom.xml file to include the following dependencies:
1
2
3
4
5
6
7
8
9
10
11
12
13
14
15
16
17
18
19
20
21
22
23
24
25
26
27
28
29
30
31
32
<dependencies>
    <dependency>
        <groupId>org.eclipse.jetty</groupId>
        <artifactId>jetty-server</artifactId>
        <version>9.2.3.v20140905</version>
    </dependency>
    <dependency>
        <groupId>org.eclipse.jetty</groupId>
        <artifactId>jetty-servlet</artifactId>
        <version>9.2.3.v20140905</version>
    </dependency>
    <dependency>
        <groupId>org.glassfish.jersey.core</groupId>
        <artifactId>jersey-server</artifactId>
        <version>2.7</version>
    </dependency>
    <dependency>
        <groupId>org.glassfish.jersey.containers</groupId>
        <artifactId>jersey-container-servlet-core</artifactId>
        <version>2.7</version>
    </dependency>
    <dependency>
        <groupId>org.glassfish.jersey.containers</groupId>
        <artifactId>jersey-container-jetty-http</artifactId>
        <version>2.7</version>
    </dependency>
    <dependency>
        <groupId>org.glassfish.jersey.media</groupId>
        <artifactId>jersey-media-moxy</artifactId>
        <version>2.7</version>
    </dependency>
</dependencies>
Note that there may be newer versions of these dependencies. Visit http://mvnrepository.com/ to check for new versions.
Server and REST service
Now we need to create a simple test REST service class EntryPoint:
1
2
3
4
5
6
7
8
9
10
11
12
13
14
15
16
17
package com.rest.test;

import javax.ws.rs.GET;
import javax.ws.rs.Path;
import javax.ws.rs.Produces;
import javax.ws.rs.core.MediaType;

@Path("/entry-point")
public class EntryPoint {

    @GET
    @Path("test")
    @Produces(MediaType.TEXT_PLAIN)
    public String test() {
        return "Test";
    }
}
Afterwards we need to update the main class (i.e. App.java), which will start the server:
1
2
3
4
5
6
7
8
9
10
11
12
13
14
15
16
17
18
19
20
21
22
23
24
25
26
27
28
29
30
31
32
package com.rest.test;

import org.eclipse.jetty.server.Server;
import org.eclipse.jetty.servlet.ServletContextHandler;
import org.eclipse.jetty.servlet.ServletHolder;

public class App {
    public static void main(String[] args) throws Exception {
        ServletContextHandler context = new ServletContextHandler(ServletContextHandler.SESSIONS);
        context.setContextPath("/");

        Server jettyServer = new Server(8080);
        jettyServer.setHandler(context);

        ServletHolder jerseyServlet = context.addServlet(
             org.glassfish.jersey.servlet.ServletContainer.class, "/*");
        jerseyServlet.setInitOrder(0);

        // Tells the Jersey Servlet which REST service/class to load.
        jerseyServlet.setInitParameter(
           "jersey.config.server.provider.classnames",
           EntryPoint.class.getCanonicalName());

        try {
            jettyServer.start();
            jettyServer.join();
        } finally {
            jettyServer.destroy();
        }
    }
}
Building a Single Uber Jar
This step is in fact optional. It allows you to create an executable single/uber jar file with all dependencies. You can then execute it from any java-endabled machine. To do so, update the pom.xml with the following:
1
2
3
4
5
6
7
8
9
10
11
12
13
14
15
16
17
18
19
20
21
22
23
24
25
26
27
28
29
30
31
32
33
34
35
36
37
38
39
40
41
42
43
<build>
  <plugins>
    <plugin>
      <groupId>org.apache.maven.plugins</groupId>
      <artifactId>maven-shade-plugin</artifactId>
      <version>1.6</version>
      <configuration>
        <createDependencyReducedPom>true</createDependencyReducedPom>
        <filters>
          <filter>
            <artifact>*:*</artifact>
            <excludes>
              <exclude>META-INF/*.SF</exclude>
              <exclude>META-INF/*.DSA</exclude>
              <exclude>META-INF/*.RSA</exclude>
            </excludes>
          </filter>
        </filters>
      </configuration>

      <executions>
        <execution>
          <phase>package</phase>
          <goals>
            <goal>shade</goal>
          </goals>
          <configuration>
            <transformers>
              <transformer
                implementation="org.apache.maven.plugins.shade.resource.ServicesResourceTransformer" />
              <transformer
                implementation="org.apache.maven.plugins.shade.resource.ManifestResourceTransformer">
                <manifestEntries>
                  <Main-Class>com.rest.test.App</Main-Class>
                </manifestEntries>
              </transformer>
            </transformers>
          </configuration>
        </execution>
      </executions>
    </plugin>
  </plugins>
</build>
Now you can build and the run the jar file:
1
2
3
4
cd restprj
mvn clean install
cd target
java -jar restprj-1.0-SNAPSHOT.jar
At this point you can open http://localhost:8080/entry-point/test in your browser to test the web service.
Eclipse
This section is also optional. It describes how to import the Maven project in Eclipse, so you can run and debug your app from there.
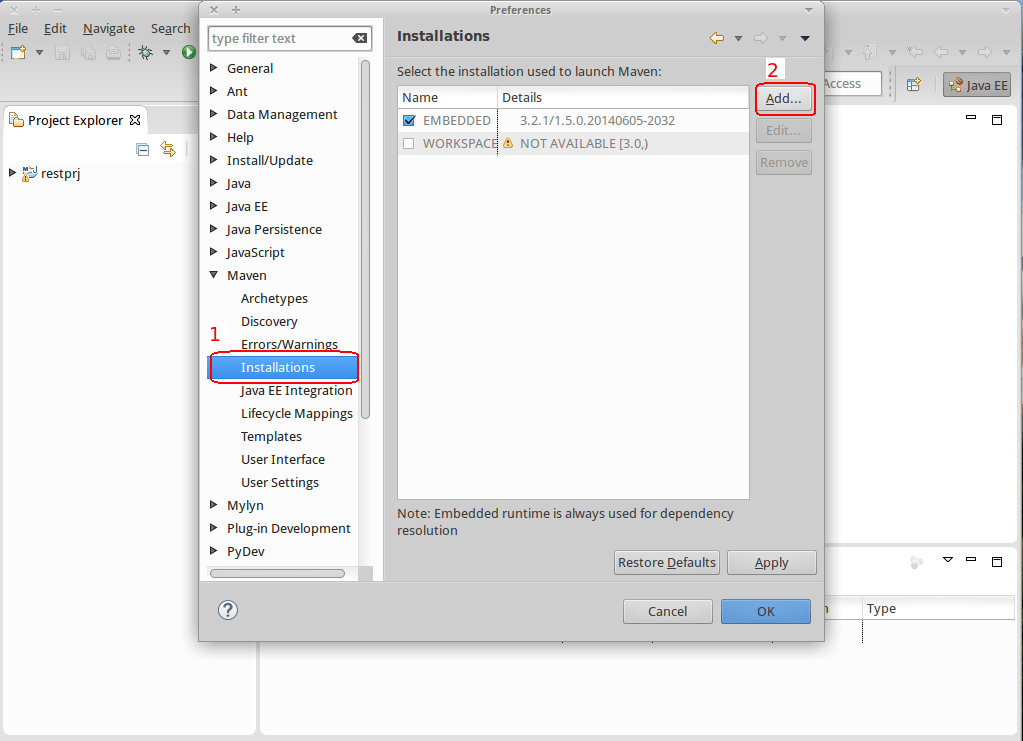
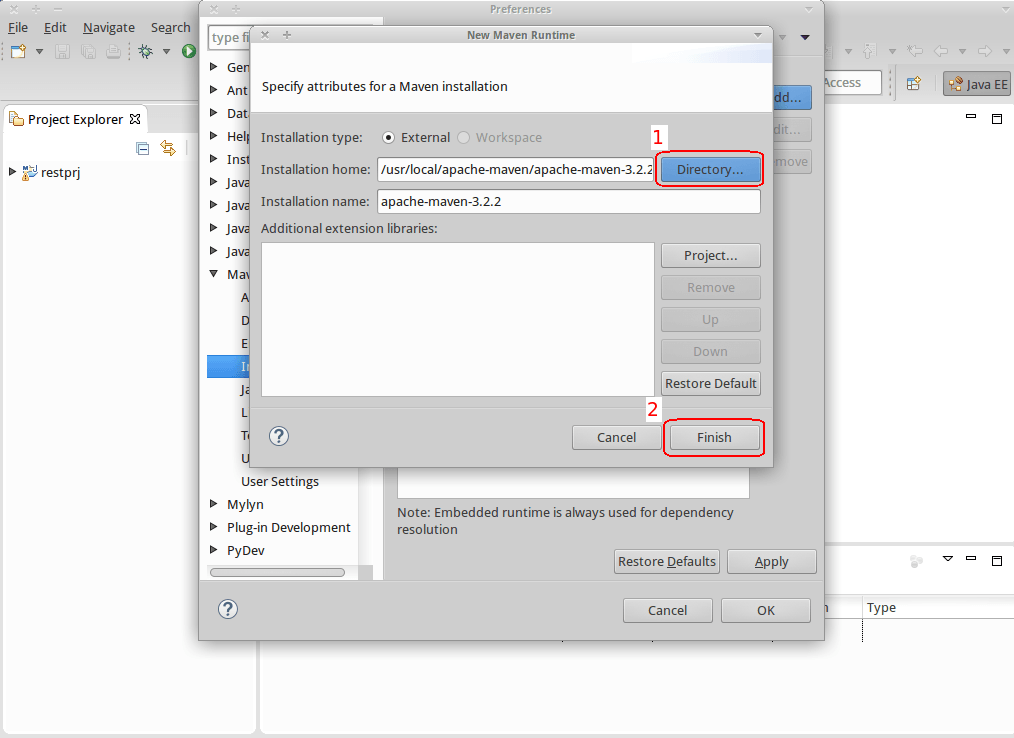
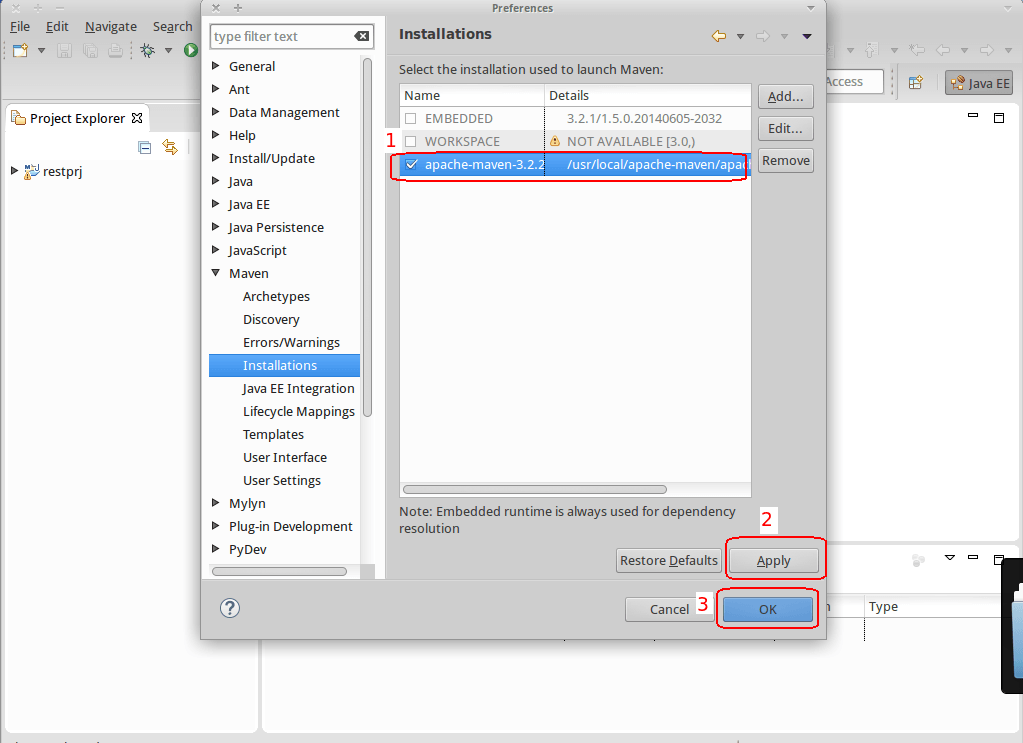
First you need to set up the Eclipse maven environment:
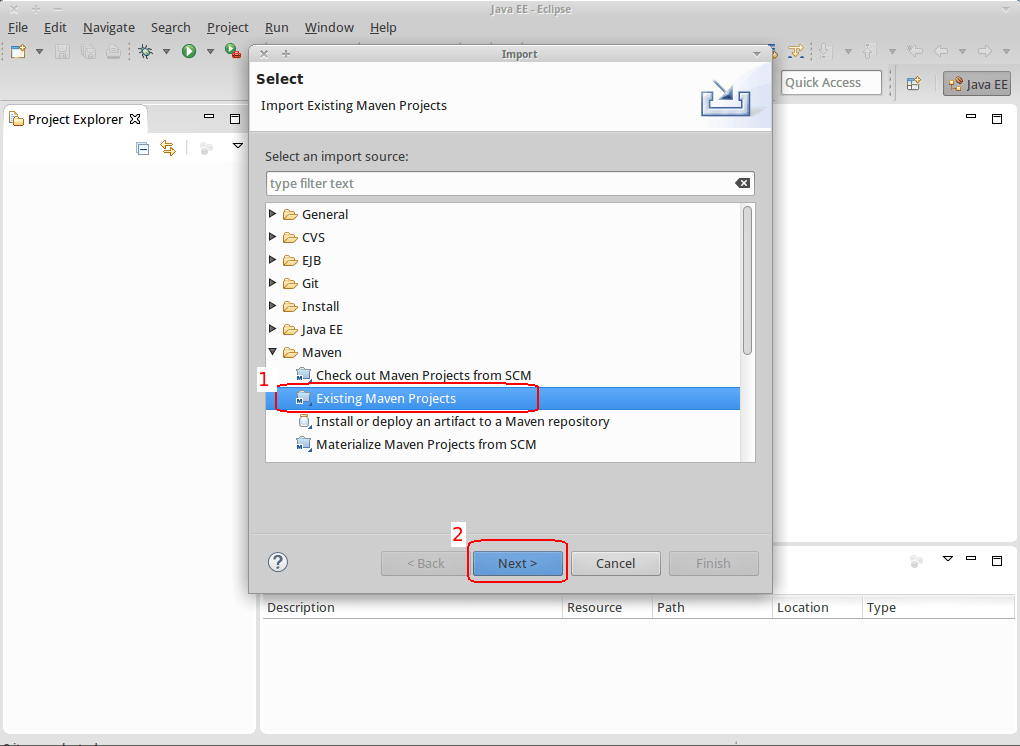
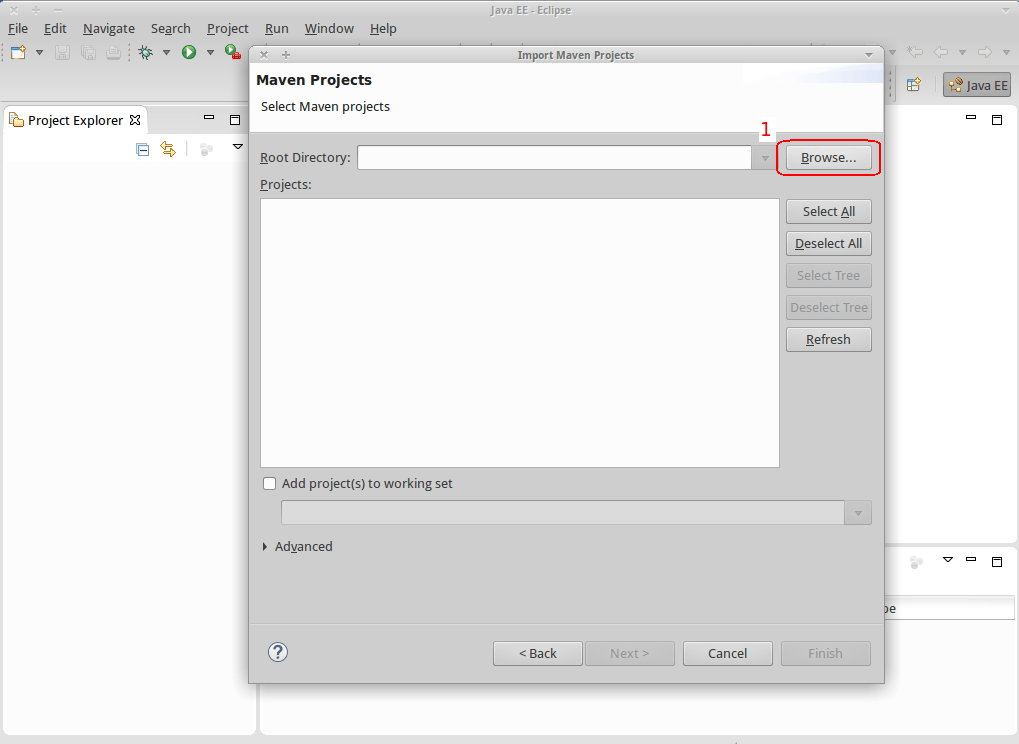
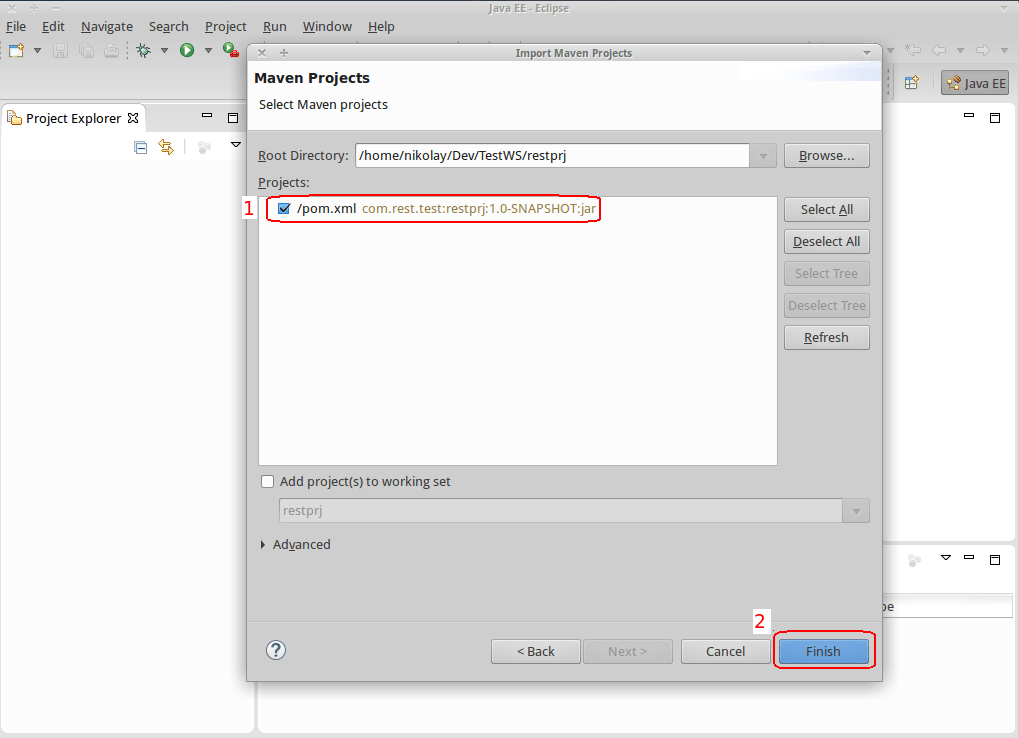
Then you need to import the project:
References
This post is based on the following StackOverflow discussions: